This guide explains how to install the HeadQ Salesforce Integration Package and connect your Salesforce org to HeadQ using a secure OAuth 2.0 flow.
After completing these steps, HeadQ can create Leads and Opportunities from your Salesforce environment.
Prerequisites
Before starting:
- You must be a Salesforce System Administrator
- You must have a HeadQ account with admin access
- You need access to the Salesforce Production environment
- Your organization must allow installation of managed packages
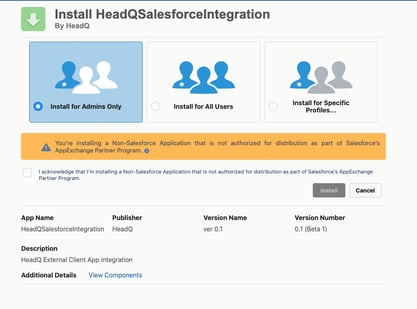
Install the HeadQ Salesforce Package
- Log in to your Salesforce org as an administrator.
- Open the installation link:
- You will see the installation screen.
- Choose Install for All Users
- (Recommended. You can grant access to specific users later.)
- Click Install
- Salesforce will complete the installation (may take a minute)
When installation is complete, you should see a success message.
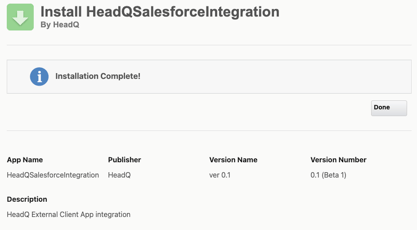
Confirm the Package Is Installed
- Go to Setup → Installed Packages
- Look for: HeadQSalesforceIntegration
Connect Salesforce from Your HeadQ Account
- Log in to your HeadQ Admin Panel
- Go to: Settings → Integrations → Add new integeration → Salesforce
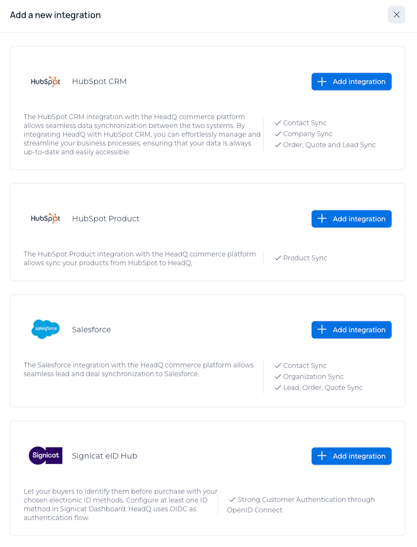
- Click Add integration
- This will redirect you to a Salesforce login screen.
- Log in using your Salesforce Admin credentials
- Salesforce will show a permission request screen: Click Allow
After approval, you will return to HeadQ and see a success message.
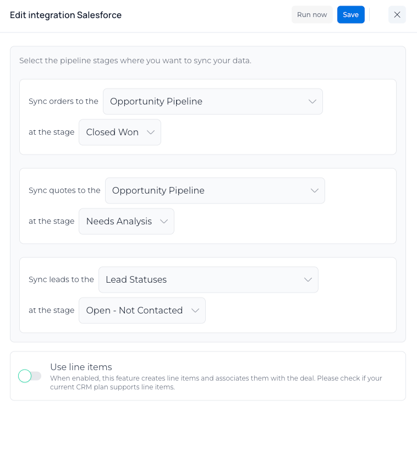
Edit Integration
- Specify which leads and deals are synced and where in Salesforce
Verify the Integration
HeadQ will automatically test the connection. To ensure everything works:
- Create a test Lead in HeadQ
- Run a manual sync by clicking "Run now" or wait for the automatic sync
- Confirm the Lead appears in the Salesforce view
- The information the HeadQ sends with the lead can be found in the lead’s Description field in Salesforce