In HeadQ, visual media plays a critical role in enhancing user experience and supporting the decision-making process. Whether for product visualization or assisting with options and configurations, the correct use of media — including images, videos, and GIFs — can significantly impact clarity and ease of use.
Background
Let’s break down where and how media is used in the system.
1. Product Images in the Product Layer and CPQ
Product media — images, videos, and GIFs — are essential in both the product layer and CPQ modules for clearly representing the goods being offered. A single product may have multiple media files to showcase different angles, features, or use cases. Additionally, each product variant (such as different colors or sizes) can have its own specific media. This helps users easily distinguish between variations and make informed decisions during configuration and quoting.
2. Shopping Cart and Quote Cart Images
Media in the shopping and quote carts provides users with a visual reference for the items they are purchasing or quoting. These visuals reinforce the user's choices and confirm that the correct products or configurations have been selected, reducing errors and enhancing the overall experience during checkout.
3. Option Image Grid
In cases where products come with multiple customizable options — such as colors, materials, or add-ons — images, videos, or GIFs can be assigned to each option.
This ensures that users are fully aware of their choices and can confidently proceed with their selection.
4. Product Details Media
Media can also be used within the Product Details functionality (see How to add product details). Here, media items such as images, videos, and GIFs can be freely combined to illustrate product information. Unlike in the Product Layer or CPQ, images here don’t need to share the same aspect ratio — you can use both 4:3 and 16:9 formats, as well as embedded videos, depending on the desired layout and content.
5. Managing Media via the Media Gallery
All media used in HeadQ can be managed centrally through the Media Gallery, found under Products → Media.
The Media Gallery allows you to:
-
Edit, rename, crop, and delete media items
-
Organize files into folders for easier management
-
Drag and drop one or multiple media files into folders
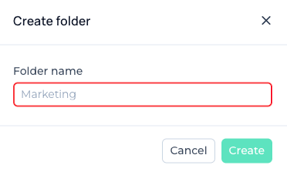
To create a new folder:
-
Go to the Media Gallery main view
-
Click New folder
-
Enter a name for the folder and "Create"
To add images to a folder:
-
Drag and drop existing images into the folder, or
-
Open the folder and upload new images directly into it.
To rename or delete a folder:
-
Hover your mouse over the folder.
-
Use the available options to rename or delete the folder.
Folders make it easier to maintain organized media collections, especially when dealing with large product catalogs or multiple variants.
6. Titles and Captions
Each media file can include a title and caption:
-
Title: Used internally for identification and search.
-
Caption: Displayed below the media to provide users with additional context or information — for example, explaining product features, materials, or use cases.
7. Cropping and Image Ratios
You can crop images directly within HeadQ to ensure they fit perfectly in different contexts. Cropping options include freeform, 4:5, and 16:9 ratios.
We recommend:
-
4:5 for images in the Product Layer
- 16:9 for images in the CPQ
However, you have full control over the shape — the product’s nature or presentation may determine what works best visually.
8. Image Size and Optimization
HeadQ supports uploads up to 10 MB per file, but for optimal performance, use web-optimized media.
-
Ideal image width: 1500–2500 px
-
Typical file size: 100–500 KB
Using optimized images ensures your configurators and products load quickly and display smoothly across devices.
Summary of Best Practices
-
Use a mix of images, videos, and GIFs to best demonstrate your products.
-
Keep titles concise and captions informative.
-
Crop and resize images as needed for each context.
-
Use the Media Gallery to keep assets organized and consistent across products.
-
Optimize file sizes to maintain fast performance.
By following these best practices, you’ll ensure your media content is visually engaging, consistent, and effective in communicating product value to users.