
Overview
Setting up rules in HeadQ is a two-step process:
- Create Properties — define custom data fields for products, options, or option values
- Create Constraints — build rules that use those properties to control what is shown or available in the configurator
Step 1: Creating Properties
Properties are custom data fields that can be assigned to products, options, or option values. They are used as the basis for constraint logic.
To create a property, navigate to the Properties tab in your CPQ or Product and click + New product property.

When creating a property, you define:
- Object type — whether the property belongs to a Product, Option, or Option value
- Label — the display name of the property
- Field type — the type of data the property holds:
- Text
- Number
- Date
- Checkbox
- Dropdown
- Tags
- Placeholder — optional hint text shown in the field
- Description — optional description of the property
- Required — toggle to make the field mandatory
Once created, properties appear as columns in the Properties view, where you can assign values to each product, option, or option value.

Property matching across levels
Properties can be created at one level but used to control elements at a different level. For example, an Option value -level property can be used to drive a rule that targets an Option value, an Option, or a Product. This cross-level matching gives you precise control over your configuration logic.
Step 2: Creating Constraints (Rules)
Once properties have been created and values assigned, you can build constraints to control the configuration logic.
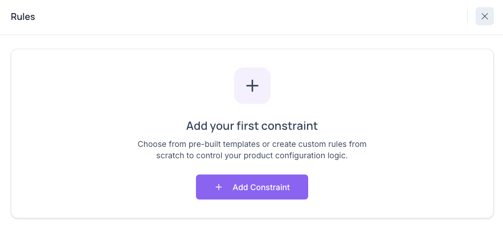
Navigate to the Rules tab in your CPQ editor and click + Add Constraint.
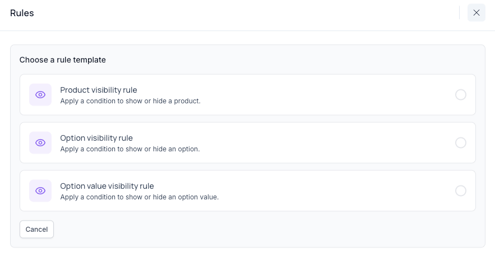
Choosing a rule template
First select a rule template based on what you want to control:
- Product visibility rule — apply a condition to show or hide a product
- Option visibility rule — apply a condition to show or hide an option
- Option value visibility rule — apply a condition to show or hide an option value
Configuring the constraint
Each constraint is configured with the following fields:
- Constraint name (optional) — a descriptive name to help identify the rule
- Rule enabled — toggle to activate or deactivate the rule without deleting it
- IF — define the condition:
- Select the level: Product, Option or Option value
- Select the specific option or option value
- Select the Property to evaluate
- Select the Relationship: equals, is not equal to, is greater than, or is less than
- Select the target level (Produt, Option or Option value) and the Target property to compare against
- Show — makes the element visible
- Hide — hides the element
- Condition — the rule itself does not perform any action, but can be referenced in the Dependencies field of other rules to build more complex logic
- Disable — grays out the option value so it cannot be selected
- Force select — automatically selects the option value
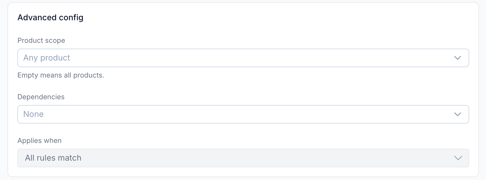
Advanced config
The Advanced config section gives you additional control over how a rule is applied:
- Product scope — select which products the rule applies to. If left empty, the rule applies to all products in the configurator
- Dependencies — link this rule to one or more other rules. Combined with the Condition action, this allows you to build more complex, multi-layered logic
- Applies when — set to All rules match or adjust to control whether all or some of the conditions must be met
A plain-text summary of the rule is shown at the bottom of the editor, making it easy to verify the logic before saving.
Where to build rules
Rules can be built in two places:
- From the CPQ editor — you can see and manage rules for all products, options, and option values in the entire configurator
- From an individual product — you can see and manage rules that relate specifically to that product
If the same option is used across multiple products, or the same product appears in multiple configurators, any rules defined for that option or product apply everywhere it is used. Keep this in mind when building rules to avoid unintended side effects in other configurators.