
Available with any of the following subscriptions: Growth, Enterprise.*
*paid add-on
Adding a New Distributor
To add a new distributor, navigate to Distributors from the top navigation bar.
Then click + Add Distributor in the top-right corner.

1. Fill in Distributor Details
Start by entering the distributor’s basic information:
- Distributor Name
- Website URL
- Contact Details
- Address Information
When you add the distributor’s website URL, HeadQ automatically fetches available brand information from the website and pre-fills the Brand Identity section when possible.
2. Add Contacts
Click + Add Contact to add one or more contact persons for the distributor.
You can add details such as:
- Name
- Email Address
- Phone Number
- Role
These contacts can later be used for notifications and distributor management.
3. Add Distributor Privacy Policy
Add the distributor’s Privacy Policy information.
This information can be shown in places such as:
- Checkout
- Quote Requests
- Email Templates
This helps ensure buyers always see the correct distributor-specific privacy information.
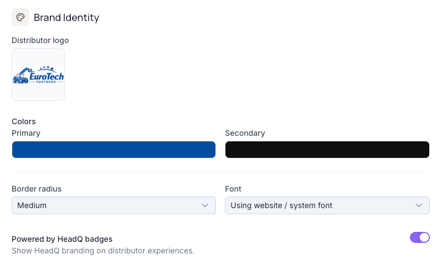
4. Review Brand Identity
Under Brand Identity, you can customize the distributor’s branding, including:
- Logo
- Brand Colors
- Company Information
If a website URL was added earlier, HeadQ may already populate part of this information automatically.
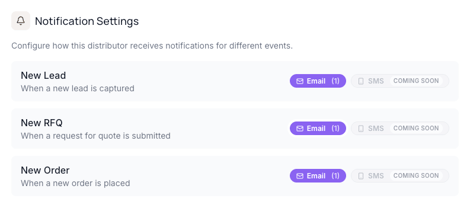
5. Configure Notification Settings
Under Notification Settings, add the email addresses that should receive notifications about:
- New Leads
- Quote Requests
- Orders
You can add multiple recipients if needed.
6. Configure Markets & Languages
Under Markets & Languages, define where the distributor operates.
You can assign:
- Continents
- Countries
- Specific Regions
This information is used to determine how leads and quote requests coming from the manufacturer’s own website are automatically routed to the correct distributor.
7. Define Available Products
Next, define which of your products the distributor is allowed to sell.
This allows you to control distributor-specific product visibility and availability.
Read more:
Managing Distributor Product Availability
8. Configure Tier Assignment (Optional)
If you are using Tier Assignment, you can assign the distributor to a specific tier.
Read more:
Tier Assignment in HeadQ Distributors
9. Assign a Pricebook
Finally, select which Pricebook the distributor should use.
If no Pricebook is assigned, HeadQ will automatically use the default Pricebook.
Read more:
Pricebooks in HeadQ